Thursday, March 30, 2006

Oak & Pine Adirondack

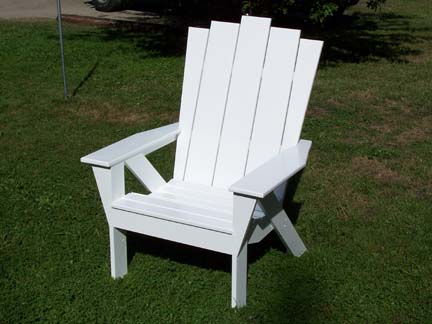
Technically, it's not done because the arms haven't been screwed on yet. But it looks done!

I got the seat slats attached tonight and I cut the notches out of the arms so the fit the way they should, but I'm tired so I'm going to call it a night... but first some details and pictures!

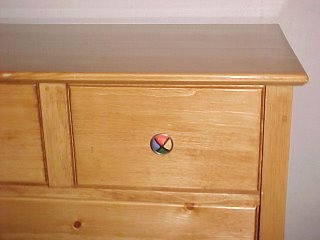
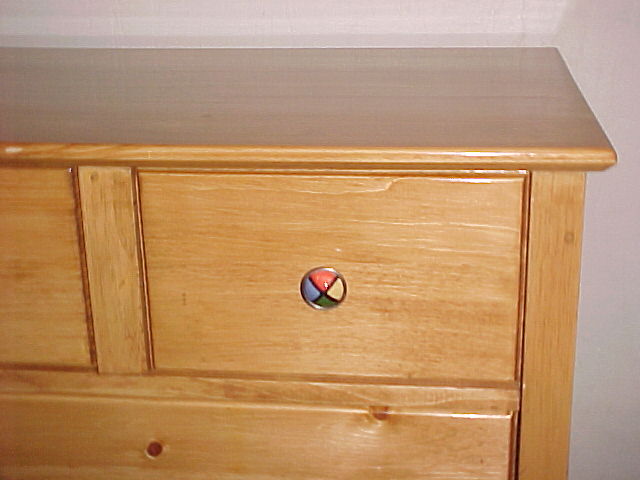
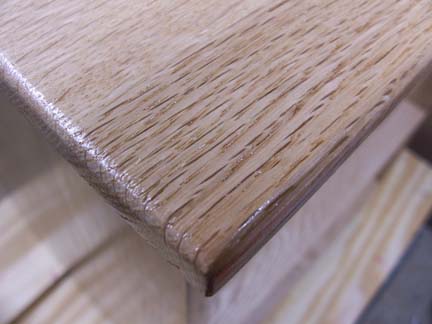
It seems like everything I read about woodworking, there is talk of grain matching. Basically this is when the woodworker takes great care in selecting the pieces being used. A simple example would be two dresser drawers that are next to each other. These drawer fronts should ideally be cut from the same piece of wood so the grains flows from one drawer to the next.

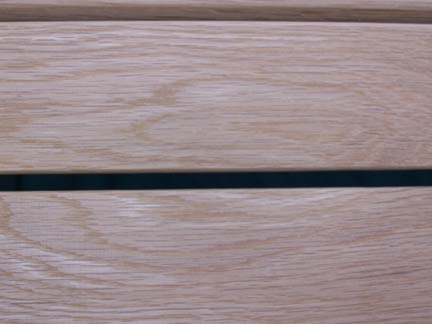
I took this philosophy and applied it to the seat of this adirondack chair. Take a look, you can see in this picture that the two seat slats used to be one piece of wood. The front three pair of seat slats have this look. Since there are seven total slats, the one in the back is the odd one out.

Here are a couple more shots of the chair in full view.


and, of course, it's quite comfortable!

Wednesday, March 29, 2006

From the Ground Up

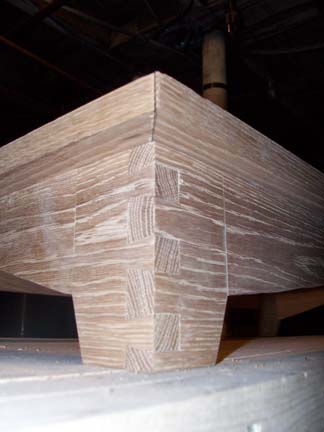
As I mentioned the other day, I have started working on a new dresser for my youngest daughter. The style is a modified Thos. Moser seven drawer dresser. One of the biggest differences in the Thos. Moser seven drawer dresser and my modified design, (other than quality!), is the base. As much as I like the style of the Thos. Moser version, I'm not a big fan of the base on his. So I found a design from an entertainment cabinet in a woodworking magazine and modified that a little more to my liking.

I've completed all of the design and sizing work. I have even thrown together a quick mock up in pine in to a better idea of how things will look. And I've started piecing it together! The base design that I have is separate from the rest of the dresser, so I've started there. Here are a couple of pictures of what I've got so far...


I realize this doesn't show off much, but that's kinda the idea... is just a tease!

Sunday, March 26, 2006

All in a Days Work

I got to spend most of the day down in the dungeon today. I even made some progress on the two projects I'm working on!

I finished painting all of the pine pieces for the new adirondack. I also cut all of the white oak pieces needed as well. The back is partially assembled, there is only one more support brace that I need to attach.

And then there's the new project... This will be the my biggest undertaking to date. I'm building a new dresser for my youngest daughter. This will be another seven drawer dresser, similar to the one I made my oldest daughter, except is going to be about 6 inches wider and a few inches taller. I'm also taking some comments made on the other dresser into consideration on this new one. I'm going to a larger drawer at the bottom, and each drawer will get progressively smaller.

Project Preparation

It's Spring time, so it's time to get the Adirondacks rolling again! I've decided that for this next one, I'd build the base with Eastern White Pine and paint it with a semi-gloss exterior white paint. The back, arm rests and seat are all going to be made with White Oak that I will leave natural. I've read quite a bit lately that shows White Oak has a nice resistance to rot, so it should handle the weather well. Right now, I'm finishing the painting on the frame and I've cut the seat slats to size. I'm hoping to get this wrapped up by next weekend.

it'll be like merging these to chairs together...


I've got another project that I'm working on as well, but I'm not ready to start getting into the details of this quite yet...

Saturday, March 11, 2006

It’s Just Sad Really

I’ve got a great wood supplier that’s only about a 20 minute drive from my house. Tommila Brothers have a great selection of locally grown lumber including Red & White Oak, Cherry, Birch, Black Walnut, Hickory and Eastern White Pine among others. They are also one of those places where you can get Kiln dried rough or S4S lumber. Most of what I have purchased has been the S4S since I don’t yet have a thickness planer.

Last year, right around my birthday, my father and brother-in-law both won gift certificates to Tommila’s at a local home show. I dropped a couple of not-so-subtle hints that these gift certificates would make a great birthday present. Money for wood is always a nice thing to have, and sometimes seems hard to come by. So I ordered 50 board feet of S4S White Oak and with the gift certificates it only cost me $20! Trust me, that is a heck of a deal!

So Chuck, at Tommila’s, took my order and let me know it might be a couple weeks before the order’s ready. He even offered to drop it off at my house since he drives that way to get home each day. Four days later I got a call that my lumber order was ready and Chuck would be dropping it off that night.

I had already cleared a spot on my enclosed front porch to stack my loot, making it a nice easy shot to unload. When Chuck arrived, I grabbed the top board on a stack of about 7 pieces. I place the board down on the front porch and turn to see chuck carrying the whole stack…!

All I could do was laugh and try and explain away the fact that I sit on my butt each day in front of a computer talking on the phone. I quickly grabbed the next stack of Oak, hoping that I wouldn’t embarrass myself any further!

Wednesday, March 08, 2006

You Want Me to Build What?

I've got a new small project in the works, but I've been a little under the weather lately and need some more Black Walnut to complete it. So I'm going to share a little flashback with you...


Back in November of 2004 I was asked the question that I’m sure all woodworking fathers would love to hear. My oldest daughter, Jasmine, asked me to build something for her!

Not just a random thing, but a specific request. At the time of this request, Jasmine was 10. She’s a smart girl, but she has a habit of proving that common sense just isn’t all that common!

So, I’m in the hallway upstairs one night putting my programming books on a shelf. I had to move them up there to get them out of the way in the dungeon. Jasmine came out of her room and following conversation took place:

Jasmine: “Can you build me a drawer for Christmas?”
me: “You want a drawer?”
Jasmine: “Yeah, you know, to put my clothes in.” (...like I’m some sort of idiot.)
me: “Where are you going to put it?”
Jasmine: “In my room.”
me: “A drawer. Just a drawer?”
Jasmine: “Yeah.”
me: “You realize that a drawer is the box that that goes in a dresser, right? Do you want a dresser?”
Jasmine: “Oh yeah, that! Can you build me one of those for Christmas?”
me: “Yeah, sure.”


It ended up being ready for her birthday in April!
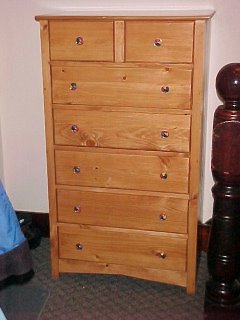


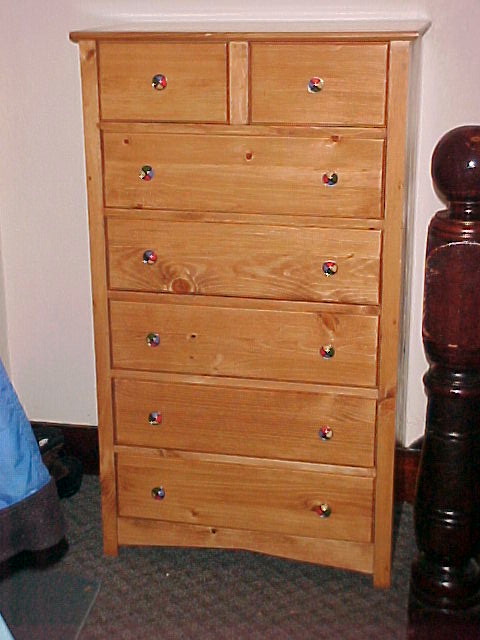
I built it with Eastern White Pine. It's finished with a couple coats of Ipswich Pine and a few coats of clear semi-gloss polyurethane. My father-in-law was nice enough to do the finishing for me. Though I had tofight to get him to use the stain I wanted. He wanted to go with more of a Dark Walnut. I'm not really a big fan of dark stained wood, and since I bought the stain, he did it how I wanted. I also chose to not use any mechanical drawer slides, figuring that they will only be the first thing to wear out anyway.

And I think this picture was taken the last time all of the drawers were shut at the same time! Soon after, it went up to her room and has had clothes sticking out ever since...
Sunday, February 19, 2006

Good Things Come to Those Who Wait

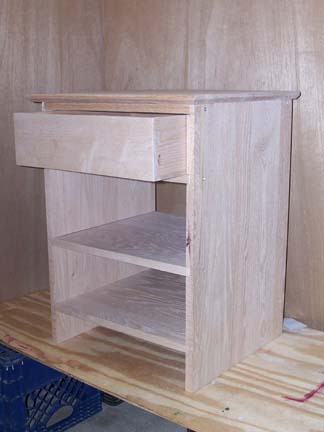
And with a final coat of finish on the bottom of the drawer, the Red Oak nightstand is complete!

Well almost complete... I picked up a piece of 1/4" plywood to make the back, but that's nothing. I am happy with the results. And most importantly, I learned a lot from this project. Ok, I won't delay the unvailing any longer, take a look...


This will be a nice replacement for the crappy little metal filing cabinet that is currently sitting on my side of the bed. The really big question though... what to work on next?

Though my wife doesn't think we need one, I would like to build a hall table. I'm not sure why, I think it's just the simplicity of the piece that I like it... I also want to build a blanket chest for each of my girls. And at the speed I get things done, I should probably start on these now to get them done before they graduate high school! I'd also like to build a bed frame and new dresser for our room... so many choices, how does one decide?? Any suggestions?

Saturday, February 18, 2006

Could it Possibly be True??

Could it really be true that a project that has been in the works for 10 months, one that has survived a devestating flood, one that has been neglected while countless other projects get all the glory, could this project possibly get finished TODAY!?!?

Let's hope so. I'm happy with the looks of the nightstand itself, so now it's just a matter of a couple more coats of finish on the drawer and we will be done. I applied the first coat of finish to the drawer last night and a second coat this morning. I should be able to apply a third coat around lunch time and by dinner...

here's a little picture of how the nightstand looks right now...

Monday, February 13, 2006

Still Here!

I had to take a trip down to Houston, TX last week for the real job. That pretty much eliminated any chance of hanging out in the dungeon. I got back down there today to put another coat of poly on that nightstand. This is coat #3. I think I may go for a total of 5.

no pictures today though, I'm going to wait until this one is completed before displaying anymore.

Tuesday, January 31, 2006

The Display Case

Ok, so I was a little excited this morning when I woke up and trotted on down to the dungeon to get the display case finished before running off to the real job. I can say that I really didn't care for showing of my pens in a goofy little box that my bank checks came in...

It came out pretty cool. The outer box is made with Red Oak. The dividers are all Eastern White Pine. I'm thinking that the next one will probably be made out of just Pine since it's a little easier to work with.


I also made 3 more pens tonight. Would have had more if it weren't for a couple of blow-outs...

Monday, January 30, 2006

Two Projects Near Completion

~ Project 1: The Nightstand

Tonight I finished sanding and applied the first coat of a water-based Polycrylic from Minwax to the nightstand. I suppose to a degree it's sheer laziness, but I really do prefer the cleanup of a water-based product over an oil-based product. Harsh chemicals just don't really appeal to me...

The first coat went fairly well. I quickly learned a few things about my construction techniques that will have to be modified before the next big project. All in all, I'm happy with how it's coming along though. I'll need to do a light sanding before applying a second coat of the Polycrylic, and I hope that will happen tomorrow.

~ Project 2: Pen Display Case

I haven't really mentioned this, but I have been playing with this project for a few days now. I made a simple box with some white oak using the Leigh Dovetail Jig to make the corner joints. I attached a piece of quarter inch plywood into a recess in the bottom of the box and made some inserts that have grooves in them big enough to hold a pen.

I've got the final coat of the same Polycrylic being used on the nightstand applied to the main portion of the pen case. I still need to apply a final coat to the little inserts and do the bottom of the main box. Again, I'm hoping to get that done tomorrow.

Wednesday, January 25, 2006

No Threat to Thomas Moser

In my world of woodworking, Thos Moser is basically a God. The work that this guy churns out is just phenominal! It's his stuff that makes me want to continue and improve as a woodworker.

To date, this man has no worries of losing any business to me! My nightstand, having been neglected again to making pens with the assistant, is back on the workbench in hopes of being completed sometime this year.

Everything has now been assembled. The drawer has had it's bits of adjustments and I'm going to call it complete. I do still need to add a back, though a quick trip to Home Depot will take care of that.

So in my near future, I see sanding. lots of sanding. But you know what keeps things going... it's the knowing that I'm going to complete a piece of furniture that will last longer than I do.

And I like that.

Thursday, January 19, 2006

Assistant Update

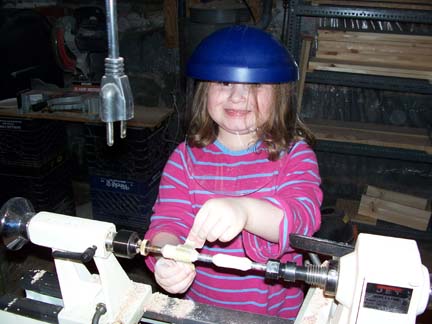
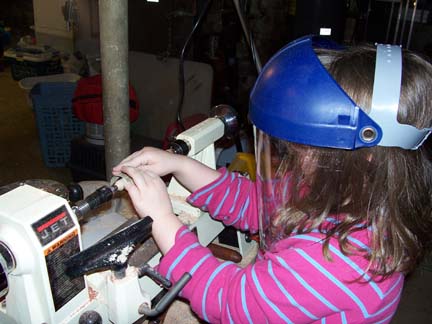
As I headed down into the dungeon to kill some time before dinner was ready, my assistant soon followed. I was showing her some of what I was working on and she said that she wanted to make something. After a bit of glancing around trying to decide what tools might be appropriate for a 5 year old, I decided that it was perhaps time to introduce her to the lathe.

Well let me tell you that girl is a natural! After getting her setup with a face shield to protect her pretty little smile, I showed her the proper way to hold the turning tools and how to approach the wood to turn it. I started out by holding her hands as she began to turn the wood. After a couple of quick cuts I had her shut off the lathe so she could see and understand what she's doing to the wood. By the time dinner was ready, she only had time to round of a couple square pieces of Bird's Eye Maple. She proudly carried these upstairs to show her momma.

After dinner though we headed back down to complete the project. After seeing her get a little more comfortable with the tools I stood right next to her as she worked the wood herself. She shaped her piece of wood to the design she wanted sanded and finished the pieces before we assembled it. I wanted this to be something that she did, so I kept my help limited as much as possible. The only thing I did was to taper the ends of the pieces to the proper size. What did she make? Well at 5 years old she made her very own pen!

Let me tell you how freaking proud and excited that I am! I can't wait to bring these pictures into work tomorrow to show what me and my little assistant worked on! check out these pictures...


Saturday, January 14, 2006

Practice Makes...Better!

I made another group of pens today. I decided to go more with the slim look on this group. I want to see about talking to a couple of local stores about selling my pens, so I don't want to go to radical on the shapes at this point. I figure that being made of exotic wood will already provide some "wow" factor, let's not blow the load all at once... so to speak.

I also wanted to see how these pen kits will look on the same type of wood. This should give me a better idea on how to match up my pen kits with the wood being used.

Making more pens also gives me more practice. Practice in turning in general, what's the best way to hold the tool, how much pressure to apply, that kind of stuff. It's also helped my speed a little bit. And it seems like speed is really going to be the deciding factor on profitability. The longer they take to make, the harder it will be to make any money...

The current tally is 3 pens and $30. Honestly, I was hoping for a bit more action on Friday at the real job, but that's really not the place I want to focus on for sales. I have to work with these people. I don't want them to fear talking to me, assuming that all I'm going to do is hock my wares!

So here's a look at todays batch:

Thursday, January 12, 2006

a Single Flake of Snow

Have you ever heard that saying, "A foot of snow starts with but a single flake"?

Well I'm hoping for a freaking blizzard. There seems to be a ton of interest in my pens down at the real job. As I mentioned in the comments of my last entry, I didn't even get my coat off this morning before I had sold that pen for $10.00! I had several people ask about more pens. In fact the guy that sits next to the person that bought todays pen, bought hers so that she can buy a Bird's Eye Maple pen!

I had several pen blanks ready to go when I got home from the real job tonight. At this point, I've got five new pens ready for new homes! Here's a look at today's stock:


The hard part about making these is that I've got so many options to work with! I've got almost 20 types of wood and 3 different hardware kits to choose from, that's what... 60 different combinations??

But Will They Talk the Talk?

As you all know, I've been bringing the pens I've made into the real job to show off a bit. It seems to have worked, seems like everyone wants one and even seem willing to pay for them!

So now we find out. I received my latest order from Woodturningz today, 30 pens kits. I ordered ten of each of the slimline Satin Pearl, Satin Gold (fancy) and Chrome (shiny/fancy). I pre-drilled enough pen blanks for 8 pens yesterday. Today I glued the brass inserts into the blanks and squared of the ends of the blanks to make them even with the brass inserts. I also have two of the Rosewood pen blank sets left from that first order of pre-drilled pen blanks that I bought originally.

Tonight I made what I hope to be my first pen to sell! So if you could all cross your fingers for me and wish me luck, I'll bring this little gem into the real job tomorrow and see what happens!

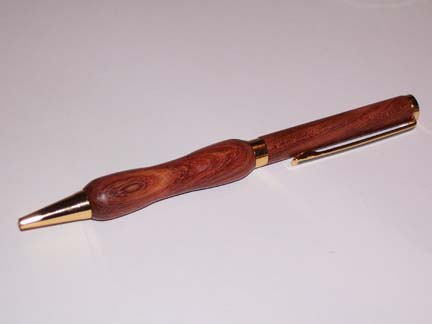
Here's a look at it. I'm especially happy with the way the grain shows in the lower half. I can honestly say that is worth every bit of the whole $10.00 I'm going to ask for it!

Tuesday, January 10, 2006

Almost Ready for Prime Time

After nine months, countless hours, pounds of frustration and more money than I care to mention... my Red Oak nightstand with Bird's Eye Maple drawer is almost done. After much refinement tonight, I've got the drawer to the point that everything fits together as it should, including fitting into the opening in the nightstand!

So let's see, what's left...
~ The drawer stop needs to be attached.
~ I still need to make another trip to Home Depot to put on a back.
~ I need to fill in the screw holes that hold the shelves in.
~ The whole thing needs a good sanding, including breaking all the sharp corners.
~ It will also need a couple coats of finish once the sanding is all done.

But I can't wait to finish all of that to show you all how this little monster is looking, so here we go:


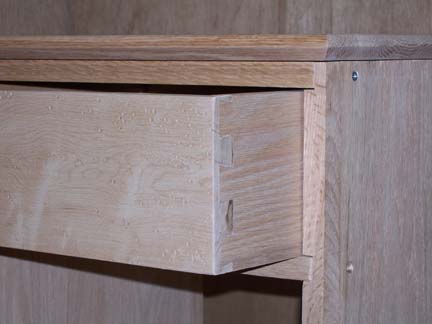
...and here's a close-up of the drawer showing the little "eyes" of the Bird's Eye Maple and the half-blind dovetail joint:

Friday, January 06, 2006

woah... not yet.

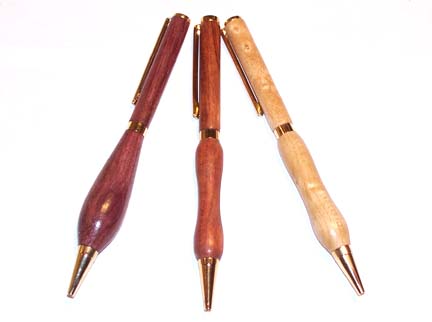
When I got into the real job this morning, I made a b-line to the admin's desk to get back the Purpleheart and Bird's Eye Maple pens. Luckily she hadn't send them out yet. After last night's trials with that woodturner's finish, I decided that I didn't want to send out those pens unfinished. And man am I glad I made that decision! I just applied that finish tonight and those pens look awesome! Don't take my word for it, check it out for yourself.

Left to right is Purpleheart, Rosewood and Bird's Eye Maple.


And a special note to dear Cindy-rella-lou-hoo:
I realize you are dying to get your hands on one of these babies, but look at this way, if you wait for me to get the technique down and work out the kinks, you can get a spectacular pen to show off to all your friends! And if you are really nice, you might even qualify for the family discount! That's 10% off retail price!!!

Thursday, January 05, 2006

Trying something new

The last class I had in woodworking was back in my Jr year of high school. What's that about 18 years ago now?! I do read as many any articles and books that I find on woodworking, so I'm feeling fairly confident in my abilities. BUT that still doesn't stop some of the fear of trying something new. This is not the cheapest hobby by any stretch of the means and it truly concerns me if I feel I'm going to waste the cherished supplies that I've got. This is part of the reason that the night stand is still not finished. The fear of destroying that lovely piece of Bird's Eye Maple tears my gut apart and allows me the opportunity to goof around with something else. Lame I know, but it's shamefully true...

Tonight while making a new pen with one of the Rosewood blanks from that original order of pre-drilled pen blanks, I decided that I would try using some of the BEHLEN Woodturner's Finish that I had ordered with Assortment "A". I haven't used this woodturner's finish yet mainly due the the "DANGER POISON!" label on the front, and the simple fact that I haven't worked with any finishes on the pens I've made so far. Again, I don't want to ruin the few pen kits that I've got. I'm really not a fan of this hazardous stuff, mainly because of the great big pain in the @ss that it is to deal with... and yeah, the hazardous part!

After turning the pen blank to size and shape, I sanded and wiped the piece down with my tack cloth as I had done on all the rest of the pens. I then popped the seal off the woodturner's finish, soaked a cloth and began slowly applying the finish as I hand turned the lathe. Well Dang! Let me tell you, that finish popped the grain and color right out on that pen blank. I could hardly believe that this was the same wood used in my first couple of pens!

Ok, ten pictures later and I can't get a decent picture. You're just going to have to take my word for it for now.

Wednesday, January 04, 2006

New pens!

I dove into making some pens from Assortment "A" today. I drilled the centers out of a couple blanks today during lunch break from the real job so that they'd be ready to go tonight when I got home from work. I was not disappointed!

I'm making these pens as birthday gifts to a couple of my top customers at the real job. My wife made my Christmas cards again this year and they were a huge hit. So I thought I'd work off of that excitement and dazzle them with custom made pens for their birthdays. Along with custom birthday cards made by my wife of course!

One of these customers was a no brainer on what type of wood to use. He is also a woodworker and is quite fond of using Purple Heart in his projects, so that's what he's getting. The other customer is a little harder to figure, so I went on the hunch that anyone would enjoy a pen made of Bird's Eye Maple.

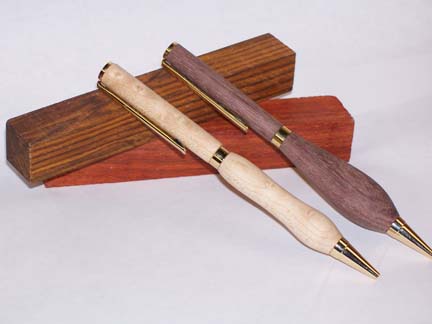
Here's a look at the end result. The Purple Heart is the darker color.


The two blocks the pens are leaning on is what the pen blanks look like before cutting, drilling and turning. These two pieces are Cocobolo (top) and Padauk.