Saturday, March 22, 2008

Segmented Rollerball

One of the girls I work with asked me to make a pen for her that she could give to her husband for his birthday this weekend. The wood is jatoba and maple. The kit is a black titanium jr gent ii rollerball (from Craft Supplies USA). I used a CA/BLO finish. There are 200+ pieces used in this pen.


I’m pretty happy with how this pen came out. There are a few details I’d like to improve though…

Tuesday, March 18, 2008

Segmented Cigar Pen

I finished this pen last night. It's the second one I'm donating to my daughter's school for a fundraiser. I'm pretty happy with how this style came out. I was a little afraid that it might be boring with only two different types of wood (jatoba and maple), but I think it does work.

The cigar style pen seems to work well for the segmentation as well. I'm a little disappointed it's being given away!


This pen has over 200 individual pieces used in the segmenting.

Thursday, February 21, 2008

Segmented Fountain Pen

One of my wife’s friends asked me if I would make a pen for her to give to her husband for his birthday. I took the opportunity of “no restrictions” to work with the Jr Gent II kit from Craft Supplies USA. I really like the look of this kit (it’s the black titanium finish)

there are 234 +/- pieces of maple, walnut and jatoba used in this pen and I’ve been working on it for the past few days (after work, well into the night!)

I’m pretty happy with the results.
Thanks for looking!


Wednesday, February 06, 2008

Bowl Practice

I turned a new bowl the other night. I'm looking to practice a little. I'd like to create a segmented bowl soon and thought it might be a good idea to practice on a solid piece first.


I used a piece of yellowheart (2"x6"x6") and sanded up to 600 grit sandpaper.

Monday, January 28, 2008

Segmented Double Knot

Here's the latest pen. This is a Sapele Cigar pen with a segmented celtic double knot made of Maple and Cherry.
There are 32 pieces in the segmented knot - 16 Maple and 16 Cherry. The picture below shows better detail of the knot, but the picture above best shows the true colors of the pen.

This pen is going to be donated to my daughter's school for an upcoming fundraiser.

Tuesday, January 22, 2008

Completed Segmented Twist

Here's the end result:


I'm hoping it grows on me, but right now... I really don't care for it.

Tuesday, January 15, 2008

Segmented Twist Fountain Pen

ok, time to reveal the teaser from the other day.

What I've been working on is a new segmented pen. This pen incorporates 234 individual pieces. Correct that, it should incorporate 234 individual pieces.

When trying to complete the second half of the pen, bits went flying all through the workshop... I wasn't to pleased about it, but what can you do. it happens.

here's what I've got:

here's the pen with what's left of the cap:

and just a shot of the cap itself:
the woods are maple, jatoba and walnut.

Wednesday, January 09, 2008

Pushing for Tuesday

The next Woodturner's Group meeting is coming up on Tuesday. At our last meeting, one of the guys did a demonstration for us on how he constructed his segmented bowls. I'm working on a project that incorporates those methods and I'd like to be able to bring it with me on Tuesday.

I'm pretty sure I have all of the components I need, it's just the detail work in putting it all together. And yes, this is a big tease, as I'm not going to show you anything yet...

Thursday, December 20, 2007

A Peek at the Possibilities

Since I started working on the teacher's pen project, I have been thinking more about what else I can do to create more intricate designs for my pens. I also attended a local bowl turners group meeting earlier this week where one of the guys talked about how he makes his segmented bowls. That seemed to kick the old imagination into high gear.

Taking my first step into segementation with smaller pieces, I cut up some maple that I had already planed down to 1/8". I laminated these little pieces with an accent color and turned a sample.

This is what I've got:

This shows me that conceptually I'm on track. Now I need to work on putting together a full sized blank so I can complete a pen and see how it looks.

Each piece of maple is only 1/8" thick. To show the scale, I'm including this picture that has my sample next to a dime. The length of the sample if just over 1 inch. The diameter of the sample is just about 3/8". The final diameter of a slimline pen would be a little bit smaller than this.


Hopefully in the next couple of days I'll have some time to work on putting that full sized blank together.

Tuesday, December 18, 2007

10 of 13

As of today, I have 10 of the 13 pens completed. The remaining three are ready to be turned. Here's a group shot of the 10.

Wednesday, December 12, 2007

Teacher Gifts continued

I completed two more of the techer gift pens tonight.
One uses a combination of black walnut and maple


and the other is sapele with maple accents.
I have to admit that I had stopped making slimline pens as I was getting a little bored with them and focused more on the cigar style. I'm happy I took on this task for my wife as it has really proven to me that a slimline doesn't have to be boring.
... now what more can I do???

Tuesday, December 11, 2007

A Baker's Dozen

My wife asked the other day if I could make a few pens for the teachers at the elementary school our two younger daughters attend. I told her I would do it, but that I wasn't going to "just turn a bunch of pens", I wanted to make something nice if I was going to do it.

I spent much of this past weekend just getting the pen blanks prepped. I've now completed four of the pens. Here's the first one.


I'm pretty happy with how it's come out. I used a new finish technique (CA/BLO) that I haven't used before and I'm quite pleased with the results. To see the others as they are completed, head on over to my other site...

Tuesday, December 04, 2007

New Sled

As I had mentioned in a previous post, my table saw died recently. One of my friends at work has been nice enough to let me borrow his to work on a few projects. To return the favor, I made him a table saw sled.


Having learned from the first sled I made, I decided I'd make this one a little more flexible. I wanted to make it so none of the great 20.5" x 32.5" space was wasted by attaching guide blocks in the middle of the sled. So I made a sub-assembly.


a couple of spring clamps hold the sub-assembly in place and now it's set to make some more segemented / laminated pen projects!


I hope he likes it as much as I do!!

Monday, November 19, 2007

Happy Birthday Nanny!

My mother-in-law had commented how much she liked the cabinet unit I made for my wife's cookie sheets, so for my mother-in-law's birthday, we decided something should be done about the cupboard in her pantry. There were a couple of"shelves" in there already, and by "shelves" I mean a couple boards that technically were holding a few things up.

So my wife and I pulled everything out of the cupboard, discussed possible solutions and took some measurements. Then I got to work.

Here's a look at what it looks like now:


I made this in three separate units (left side, center and right side) to make it a little easier to build and install. Other than building square components to go in an area that isn't square, everything went along quite smoothly. And best of all, my mother-in-law is very happy!

All three units are built with pine harvested locally by my brother-in-law. I sanded with 100 grit and then applied a BLO (Boiled Linseed Oil) finish. And here's one final picture to give a little perspective:

Thursday, November 15, 2007

The Final Step

The final step of the transformation from rough piece of wood to finished piece is a healthy coat of BLO (Boiled Linseed Oil). After the assembly of part 2 of the current project, here is what our original board looks like now.

Thursday, November 08, 2007

the Continued Transformation

My last post showed how a piece of pine being used in my current project looks before I start working on it.

After running the board through the planer and jointer, it then looks like this:


The planer gets rid of the nasty looking rough surface and leaves what resembles a typical looking board.

This typical looking board is then glued to another typical looking board to create a wider typical looking board. When that wider typical looking board is sanded, it looks more like this:


stay tuned as progress continues...

Tuesday, November 06, 2007

New Project - Teaser

One of the reasons I like this hobby is the amazing changes that my materials go through to get to the finish line.

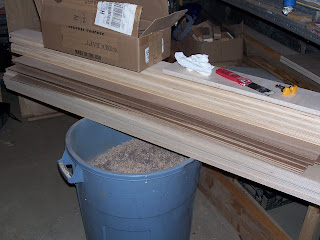
I have a new project in the works. Here's a picture of some of the material before I get started on it.


stay tuned to what happens next. I'm pushing to get this project done for this weekend.

Tuesday, October 16, 2007

How Much is "Enough"?

My wife asked me this question tonight: "Don't you have enough"?

Of course she was referring to my announcement that I was headed out to see if I could get some more of that Baltic Birch scrap wood from the local furniture shop.
My answer was simple, it was: "No"

so I ask you... how much is enough when it comes to free scraps of Baltic Birch plywood? The first picture in this group is what I picked up in this trip.


I still think the answer is no...

Sharpening Jig

Since I started turning almost two years ago I’ve thought I could learn to sharpen my gouges freehand…

I can’t.

I’m also to cheap to buy one of those commercial style jigs.

Based on a design that I cannot remeber which forum I found it in (otherwise I would be happy to link and apply credit) here’s what I’ve done. I started with a little raised base (made from some of that free scrap baltic birch plywood I can’t stop collecting) and then simply added a little extension with a “V” block to allow the handle a comfortable resting place.


I was SHOCKED at how well this cleaned up my gouge. I should have done this a LONG time ago!

Kitchen Containment

I started this project quite some time ago. This past weekend I finally got it put into place. I do need to pull it down at some point to apply a stain a poly finish to make it match the other cabinets, but for now it is serving it's purpose.


The purpose is for saving my wife's life.
We had been storing her cookie sheets and cooling racks up above the little range hood / vent thing over our stove. Everything that was up there just seemed to have a way of becoming entangled like velcro, causing everything to come crashing down if you didn't use three hands to remove something!

There is peace at last!