Tuesday, August 07, 2007

Prime Time

I like knots. Most people don't seem to, but I do. I think they add character to a piece of wood. Some knots are better than others though. Ideally a nice tight knot would be the best to incorporate into a project.

But sometimes, a knot that isn't so great can be fixed up. The knot on the underside of the bistro table top is the perfect example. I decided to keep this knot in the piece for the simple fact that the table is being painted and it won't be seen.

This knot had some dried and loose pieces in it. So when I first started putting the top together, I used a screwdriver to pluck out all the loose bits out of the knot. This left a nice gaping hole instead. I filled the hole with a mixture of 2-part epoxy and some wood shavings.

I didn't get a before picture (sorry), but I did snap a picture before I applied the primer so I could use this as a bit of education for myself.

I think if I were to need to do this again, I would just use straight 2-part epoxy and skip the wood shavings.

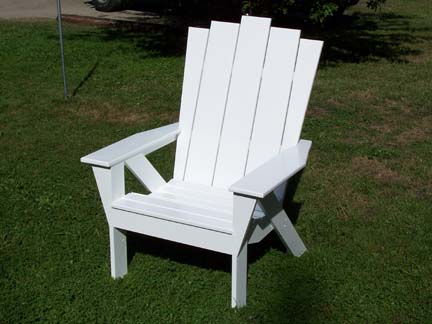
Oh and speaking of the bistro table, I got a full coat of primer on the top tonight, so here's a shot to give you an idea of how the table will look when finished.

Monday, July 16, 2007

Bistro Update

No pictures today, but I have finished the final sanding of the bistro table. All of the corners have been rounded over and the table is now ready to be finished.
I have practiced my finishing method for the table:
1) shellac - applied to seal the knots to prevent them from bleeding through the paint
2) 1st coat of primer
3) wood filler - to fill any imperfections that become visible after the 1st coat of primer is applied
4) 2nd coat of primer
5, 6 & 7) coat of exterior white latex - a light sanding will be done with 220 grit sandpaper after step 5 and 6.

I'll post pictures again after the shellac has been applied and then again when the table is completed.

Saturday, July 07, 2007

1st Contest Entry

I've entered the Bistro Table in the LumberJocks Summer 2007 contest!
This years contest has two categories

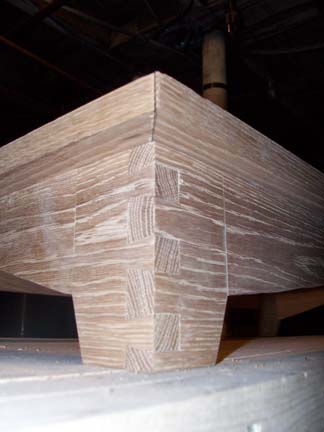
With this table project, I've had a concern over how I wanted to attach the top. Considering the top is 36" square, I knew it was going to need a system that allowed the top to be removable (if only to get the table out of the dungeon!).

After some pondering, I came up with a solution that allows for a tool-free removal of the top. Here are a couple pictures of how I achieved that.


so basically what happens, is the top is put on a little off center and is then pushed forward so the little buttons on the underside of the top lock on the little tenons that are attached to the frame. With this solution, I've entered the table in the Wood Joinery category of the LumberJocks contest. The contest runs through the month of July and the winners will be announced after the voting in early August.

Wish me luck!

Monday, June 25, 2007

She Must Love Cooking!

This is something that should have been posted a while ago...

One of the girls at work asked me to make a cutting board for her mother's birthday. She didn't want just any cutting board though. She wanted a heart shaped cutting board.
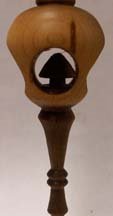
I was a bit skeptical at first even though I told her I would do it. I thought it was going to look horrible. I also thought it was going to be a bit of a waste of time since it is kind of a gag gift. Apparently this girls mom is constantly buying theme gifts for her even though she doesn't like the chosen theme. So to get her mom back, she always tries to find a gift that incorporates a heart... hence the heart cutting board.


To give you a size reference, this was cut from the full size boards I've done, so it's roughly 11"x15"x1.5".

I have been informed that her mom does love it.

Bistro Table

Ok so for anyone that still even looks at this blog, here's a REAL update!

I've got the legs and the frames sanded and I've started to assemble them. I need to make one modification still to the top frame, so that hasn't been secured yet. But that didn't stop me from snapping a picture to prove that I have actually been working on something all this time!

Keep in mind we still don't have a finished product yet. The top has been cut to size, but it still needs to be sanded and have the corners softened.
The stack of crates to the right of the table are just a bit taller than the stools that will be used with the table.


This is a modified design that I got from an article in a recent edition of Wood Magazine. For anyone interested in getting started in woodworking, Wood Magazine has my vote for the first subscription you should get. They have by far had the best projects of any subscription I've had.

Saturday, June 09, 2007

Stay Tuned!

While it may appear here that little has been going on, that's really not what's happening.

My little dungeon has had it's fair share of activity lately, I'm working on getting something "post ready"

Stay Tuned...

Wednesday, April 04, 2007

Cutting Board mini

The last showing of this style cutting board was prior to it receiving it's oil bath. Here's a nice shot of the mini with it's aged oil coatings...


Using a combination of black walnut and red leaf maple and measuring in at 11"x7.5"x1.5" in size, I'm aiming to make this little guy a standard item on the darrylmasterson.com site.

Tuesday, March 27, 2007

Setting a Standard

My thoughts are this: If I'm going to try and pursue any sort of woodworking business, having a few standard items that customers can choose from would be a good way to start. These next few posts will include a few design ideas for a standard set of Cigar Pens.

I consider the Sapele Cigar Pen the classic or standard cigar pen. Since this was the first style that I had started using and it's just got a nice warm comfortable look to it. I can see that just about anyone could use this style pen.


Sapele, also known as African Mahogany, has a nice rich brown color to it. I've modified my finishing technique slightly on the set that I made tonight. With these, I sanded with 220 and 320 grit sand paper. I then applied a coat of BLO (Boiled Linseed Oil) and wiped off the excess for a total of three coats. I then upped the speed of the lathe to the range of 2500RPM and rubbed the pen down with 0000 steel wool. The final step is to wipe the pen of with a tack cloth. This gives the pen a nice sheen.

Thursday, March 22, 2007

The Acrylic

The Blue and White is the first acrylic blank that I started working with and I think it goes fantastic with the platinum hardware. This is another that I'm considering as standard offering.

Friday, March 16, 2007

Bronze Cigar Pen

Here's the second cigar pen that I'm making for my friend. I'm happy with how both of them turned (pardon the pun) out. Of the two, I think the blue is my favorite, though the black chrome kit on this bronze blank looks pretty good.

As far as processes are concerned, I sanded this one with 220 and 320 grit paper and finshed up with a good rubbing of 0000 steel wool. A tac cloth helps clean up the dust.


I've got a couple more acrylic pens to make and then back to some using wood. I got some bloodwood from another local woodturner that I think will look real good.

Wednesday, March 14, 2007

New Acrylic Cigar Pen

I finally got around to making one of two pens I told one of my friends I would turn for her what seems like a couple months ago...


Hope she likes it!

Sunday, February 25, 2007

Completed DVD Shelf

I know it looks like it's floating in this first picture, but here is the now completed DVD shelf hanging on our living room wall. We painted the room back in early December and around the same time, I got a copy of The Family Handyman that had this project. I'm pretty happy with the outcome. I used White Oak, plywood for the back and the molding is Pine with an Early American stain. Everything was rubbed down with a couple coats of Boiled Linseed Oil.


One of the thoughts on this project is to get the DVDs out of the reach of my firecracker three year old. She can still reach them...


And finally here's a shot showing how the shelf is set over the loveseat. We are planning on upgrading to something in the leather line which should go nicely with the warm look of the Oak and BLO combo.

Monday, February 19, 2007

DVD Storage

Right after Thanksgiving I had posted about a new project that I wanted work on. Well I've finally gotten around to put some work into this project. The main case assembly was completed today as well as the sanding. Now I need to make another trip out to Home Depot to pick up some cove molding so I can add the final touches.

Here are a couple of shots of where I'm at today:


Measuring at about 41" in length, this should hold about 75 DVDs. each section is 13" wide, so I'm guessing I should be able to get 25 DVDs per section.


Thursday, February 01, 2007

Picture Practice

It's not just woodworking that a woodworker needs to be good at. Apparently we also need to have some decent photography skills as well. So I thought tonight I'd practice a little bit. This is the shot I like the best of the group I took.


The lighting could use some improvement in the shot above. The picture above was taken in the close-up mode on the camera and this doesn't use the flash. Here's a shot that I took to start today's session using the auto mode with the flash.

As far as the cutting board is concerned, this is one of my maple and walnut boards. This is a new mini size that my wife had asked for. It measures 11"x7.5"x1.5". This one here still needs to be sanded and oiled.

Thursday, January 11, 2007

Ready to Learn More

Now that I have my second bowl under my belt (and I'm still very excited that I didn't need to glue the bottom back onto this one), I'm really looking forward to the bowl turning group meeting that I'm going to on Tuesday.

My father put me in touch with someone he knows that's in this group a couple weeks ago. I'm also going to meet this fellow turner on Saturday after I finish my morning chores (bringing the trash and recycling to the dump) so I can check out his shop and see what pointers he might be able to share.

Wednesday, January 10, 2007

Bowl # 2

it might be considered a little on the thick side... but at least it's in one piece!

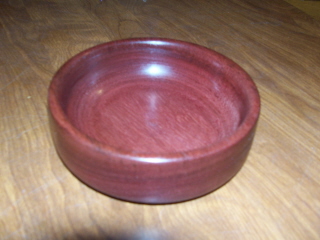
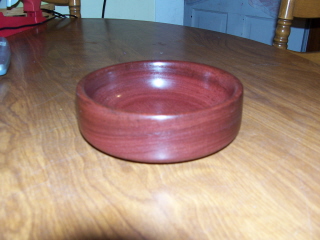
here's a bowl I made tonight out of a piece of purpleheart. I gave this one a quick coat of mineral oil after sanding it down to a 220 grit.


and another shot.

Saturday, December 30, 2006

First Bowl

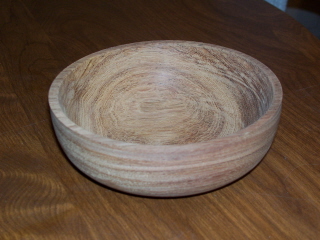
Now that I'm caught up on current orders, I thought I'd play around a little and try making a bowl on the lathe. A friend of mine picked up a few bowl blanks for me a couple weeks ago, so I grabbed the piece of Sapele and started it up.

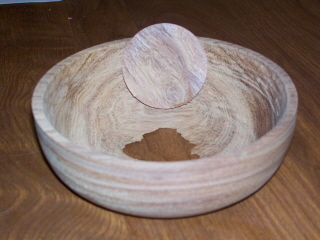
I got the bowl to the point where I would be satisfied with it simply being my first bowl... then decided that I would take one more pass with the scraper to clean up this little ridge that was on the inside lip.

the rest is history.


yup that's right, it broke right off.

I'm not throwing it into the firewood pile though... I'll keep it as a humbling reminder.
Right now it's down in the dungeon waiting for the glue to dry the bottom back on.

Wednesday, December 27, 2006

New Toy

looks like I was a good boy this year after all!!

since it was to heavy for my wife to move on her own, it wasn't left under the tree... instead we took a walk out to the mini-van so I could open this present!


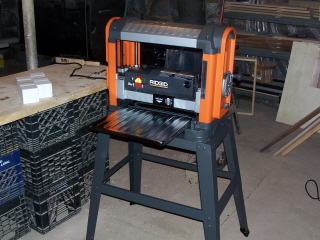
I've got it set up and turned it on as a test, but I haven't run anything through it yet. I should be getting to that in a couple days.

Wednesday, December 20, 2006

Looks Nice...Smells Horrible!

A freind asked if I could turn a couple Acrylic pens for him. Considering he has just trekked across the state (ok, it's New Hampshire and that's really only an hour and a half drive, but still...) to pick up some pen kits so I can complete an order this week, who am I to say no!?!

He wanted one to give as a gift, and the other is for his wife (and she's making me some Ginger Bread cookies, so I really do make out well on this deal!!).

I think the pens came out looking pretty nice, but man-0h-man do these things stink when cutting and drilling!!

Here's what they look like:
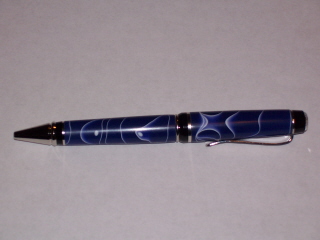
This is the gift pen. It's got a blue and white acrylic blank with a platinum kit.


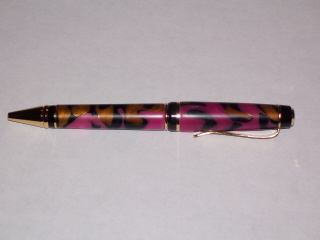
This is the pen for Mary (the Ginger Bread making wife!). Her's is this wild pink and gold acrylic blank with a 24kt gold kit.


this is a red white and blue blank that I received in compensation for an order mix-up a few weeks back. I did want to experiment on pens that were intended as gifts, so I did a test run on this one.


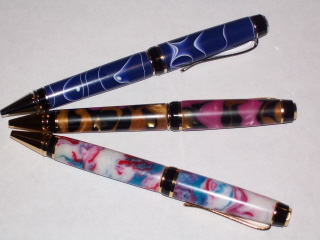
and finally a group shot.

Monday, November 27, 2006

And Now... For Something Completely Different

As I told my lovely wife, when the Craft Fair is over, I'll focus on the living room. It has been several weeks since we had decided that it was time to do something. Our little two year old had ripped off a couple pieces of the old wallpaper already. And by pieces, I mean sections. This stuff is older than I am and came off in full sheets. Unfortunately, it has sat that way since then as I've been a little pre-occupied. But with the show over and Christmas looming, now is the time.

I got the primer put on today after spending most of yesterday removing the last remnants of wallpaper and patching some small holes in the plaster. I have even got the first coat of paint on most of one wall. This is the same wall that is going to be receiving the new DVD shelf that I liked in one of the latest editions Family Handyman Magazine. I'm going to build this out of some Oak that I've got and coat it with my very favorite Boiled Linseed Oil. This will give it a nice warm look that will compliment the Athenian Green that we are putting on the wall.

pictures will follow...

Saturday, November 25, 2006

Show Results

Well the show's over and here's how it went:

I think that overall it went pretty well. The only real disappointment were the cutting boards. To high a price or lack of interest, I'm not sure.

The cigar pens did pretty well, as did the wine bottle holders. The turned tree ornaments probably did the best, including the newer ones that were made last night.

Now to figure out where to go next.

New Stuff

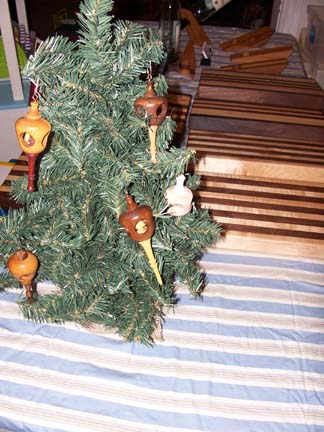
Yeah, that's right. It's 11:54 the night before my show and I have just finished making several new tree ornament designs. None of these look the same, not that they are supposed to, and that's what I like the most about them. Free form designs where I can just let the creativity flow.

...and in about 9 hours we'll find out if anyone else likes them!

Friday, November 24, 2006

Nice Savings in Time for the Holidays!

I've been wanting to buy a chuck so I can start making some bowls and other items on the lathe. I've been watching for some sort of sale and I got one today!

List price: $119.99
Sale price: $69.99
gift certificate that I've been waiting to use: $25.00
free shipping on all orders through 11/29/06 saves another $10.25

brings my total cost to $44.99!

And it should be here Tuesday or Wednesday.

Wednesday, November 22, 2006

Sneak Peak

3 days to go...

Would you like to see what my display may look like? Ok, here we go.

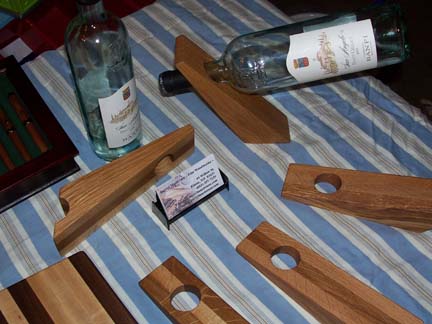
First up, here's a shot of the wine bottle holders that I have talked about but have yet to get a picture of. This shot also includes the business cards that my friend Jeremy made for me.


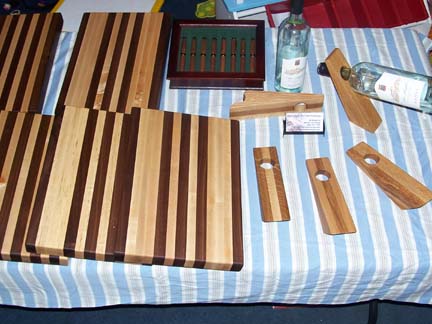
This is a shot that shows a bit more of the table setup. The actual table being used on Saturday is two feet longer than this, so I'll have a little more room. As I was trying to focus more on the actual crafts, I bought the pen display box at Michael's... I can't build everything.


And here, you can see the very few tree ornaments that I have available...


Over the next two days I hope to get a few more things done, but I'd say that for the most part I'm ready to go with what I've got.

Enjoy!

Monday, November 20, 2006

Bang Your Head...

4 days and counting...

yesterday I prepped two new ornaments. BOTH of them broke apart today as I was working on them. BOTH of them... grrrrr. where's the brick wall... I need to bang my head.


On a positive note, my friends showed up with a small gift for me tonight. It's not my birthday, and it's still a bit early for Christmas, so I had no idea what it could be. They made me some business cards for my show! I had thought it would be nice to have something like that, but with the time cruch I'm under and all I figured they would have to wait.

Thanks Mary & Jeremy!

Sunday, November 19, 2006

5 Days and Counting

The cutting boards are done!
I can make more pens, but I think I have enough for now.

Now to focus on the home stretch. I cut all the pieces I need for another eight wine bottle holders. These should go together fairly easily.

I've got two ornaments gluing up, and another smaller one piece ornament that just needs a finish applied.

A couple hours each night with some additional focus on Friday's day off and everything should be fine.

Friday, November 17, 2006

7 Days and Counting

Ok, so I've got just over a week now before my inaugural craft fair. I've finally got a grip on the cutting boards, no problems there. The cigar pens are now in full swing and I hope to finish most of them tomorrow (assuming the rest of the family doesn't think I am ditching them). I think I'd like to make a few more of the wine bottle holders. My gut tells me that as the lowest priced item, these could have a decent chance of selling well. And then there is the Christmas tree ornaments. I'm not sure I'll have as many as I initially thought I would, but I think I can still double the number that I've currently got available.

I passed out a few postcard reminders today at the real job to some people that have shown an interest in what I'm doing. That will hopefully secure a couple of visitors to my table.

All in all, I think I've got a pretty good grip on everything right now... We'll see how I feel about that come Monday!

Friday, November 10, 2006

Time to get Serious!

ok, I've got 14 days before my first ever craft fair. Let's do a quick review of inventory, shall we.

~ I have less than half of the cutting boards done that I want to finish.
~ I have a third of the cigar pens that I'd like to get done.
~ I have a few of the wine bottle holders (that I still haven't taken a picture of) done, and I think I'd like to at least double what I've got.
~ I haven't even started making any new tree ornaments...

I've always thought that I work better under pressure... I just don't know why I do this to myself!

Stay tuned, it's gonna get exciting!

Tuesday, November 07, 2006

Not Sure What to Say

I had mentioned once before that I was first introduced to woodworking while in school. In my junior year of high school, I built a rather large bookshelf made of Rock Maple. As with everthing else I had ever made, this bookshelf was given to my parents.

My parents are currently redocorating their house a little bit and they let me know that if I wanted this bookshelf back that I could have it. I thought about it a little bit and decided to go ahead and pick it up this past weekend.

I have to admit that I haven't really looked at this bookshelf since... well since I made it. While considering to pick it up, I had visions that this bookshelf was built with the same attention to detail that I have with my current projects.

All I can say is that my little fanasty of picking up this "antique" is not what I thought it would be. There are rough spots that weren't sanded out. There are pencil notes on the underside of shelves. I'm a little disappointed...

Monday, October 16, 2006

Thanks to my Daughter

My oldest daughter is in seventh grade at the middle school. She’s done a great job of continuing to try out for different activities at school. She’s gone for drama, track, field hockey and most recently student council. The unfortunate part of this is that she hasn’t made the cut on any of these activities yet. I give her great credit for trying though, that’s more than I ever did in school. Other than a stint in pop warner football my freshman year, I didn’t do anything.

So after finding out today about the outcome of the student council voting, I’ve decided that I need to push my own fears of rejection aside. I have entered into one of the regions upcoming craft fairs. If she can continue to out herself our there, I don't really feel like I have an excuse not to.

I’m going with a limited number of items to test the waters. I’m going to have cutting boards, cigar pens, wine bottle holders and some turned Christmas tree ornaments. And since I’ve got about 5 weeks to get ready for this, I’m going to have to get my butt back into the dungeon and continue sanding away like a mad man.

Wish me luck.

Wednesday, October 04, 2006

Too Well...

I knew everything was going "too well" over the past couple of days. I glued up four of these wine bottle holders out of some scrap oak along with another walnut/maple cutting board. I also glued the brass inserts into four pen blanks. I also started working on the cookie sheet rack for my wife that will go above the range vent/light thing.

So tonight, in an attempt to keep each of these projects moving along, I decided to focus on the cookie sheet rack. I had glued up the sides, top and bottom the other day, so it was time to route the dados for the shelf supports into the sides. Well only ONE side should have had the extra dados... and now both of them do. Dang it! It never pays to rush anything.

Back to the glue bench I go...

Sunday, September 24, 2006

A Fun Little Hobby

It's the little things that I really enjoy about this hobby of mine. What started as three simple pieces of Oak this morning, has now transitioned into a new item! pictures coming soon...

Sunday, September 17, 2006

You Want a Cardio Workout?

Oh, I've got the workout for you! Grab yourself a palm sander (the manual kind, not some plug in jobbie) get three grits of paper (I used 100, 150 and 220) and something roughly the size of a cutting board. I bet you know where I'm going with this! After almost an hour of sanding down, not one, but two cutting boards, I'm covered in dust and sweating like a pig. And unlike Richard Simmons, I was listening to Metallica crank through the iPod rather than the oldies.

So I've got two boards that are ready to be wiped down with a tack cloth and have the first coat of oil applied.

oh, and my interview on LumberJocks has now been posted!

Sunday, September 10, 2006

You Want to Interview Me?!?!

I was contacted the other day by Martin Sojka, the creator of LumberJocks.com. He asked me if I would be his next Jock to be interviewed! Trust me, I was just as shocked as you! I submitted my interview to him today, so I would expect it should be posted sometime this week. You can click here to go directly to the interviews page.

I have to admit that I'm a bit nervous about the whole thing. I don't have anywhere near the experience or skill that the other "Jocks" interviewed have got. But to be included with such an amazing group was not something I could pass up.

Wednesday, September 06, 2006

More Cuttingboards

I think I might have found something I'm good at. I can glue smaller boards together to form a larger flat (most of the times) board!!

Here are some new cuttingboards that I have in progress (though I'm not sure how well the fomatting is going to look):

This is the board that I was complaining about yesterday. That 32 grit sand paper (kinda like rubbing a handful of pebbles on the board) I picked up yesterday at Home Depot helped even things out a bit quicker.
Today I got the ends trimmed and evened off and I routered a 1/4" round-over on the edges.
This board is made up of Cherry, Walnut and Red Leaf Soft Maple.


This board, made of Cherry and Red Leaf Soft Maple, is next up in Line. I've arranged for the stripes to run the length of the board on this and the next few boards.
Tonight I planed the faces of each of the boards to get this one ready to be glued up. I hope to do the glue up tomorrow.


Here's a shot of one of three cuttingboards that I have rough cut. All three have the stripes running the length of the board and are all complosed of Walnut and Red Leaf Soft Maple. The other two have the outer edges starting with the maple.

All of the cuttingboards I have done and have in progress are roughly 11" x 15" x 1.5" in size.

Tuesday, September 05, 2006

Why is it...?

Why is it that the second version of a project always seems to be about 50 times harder than the first? It must be the woodworking God's way of keeping me in line. Making sure I'm not getting over-confident...

It's not that the new cutting board (go figure, I'm having trouble making a flat board!!) is coming out poorly, it's just that this one isn't going as smoothly as the first. My biggest problem, looking back on this project, is that I didn't pay as close attention to making sure that each strip was close enough in height. I've had some wicked hand planing and sanding to do over the past couple days.

After some focused work tonight, it's getting better though. Tomorrow should put me back on track.

Friday, September 01, 2006

Cuttingboard

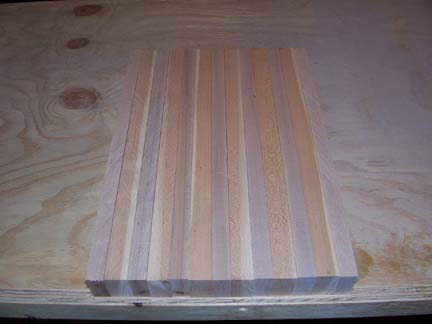
Last night, I cut the board to final width, hand planed the highspots, routered a roundover on the edges and rough sanded the whole board. Tonight, I did the finish sanding and applied a coat of BLO (Boiled Linseed Oil) for the finish. I really like how the BLO shows off the grain of the walnut (the darker stripes) in this picture:


Here's a close-up that shows off the grain in the red leaf soft maple:


This was a fun little project to do. I think I'll be making more. Christmas is coming and there were several family members that showed some interest... we'll have to wait and see.

Wednesday, August 30, 2006

Reincarnated

What was once supposed to be a laptop writing desk and a drawer for my daughter's dresser has now become a butcher-block style cutting board.

Wood Magazine had another version of a cutting board in the current issue, which got me thinking that here's another relatively quick and easy project that I can bang out and continue improving my skills with. And so far it's coming out rather nice. I've alternated strips of Black Walnut and Red Leaf Soft Maple and I'm going to coat it with Boiled Linseed Oil when it's ready.

Friday, August 25, 2006

Ornament #5

This is the fifth ornament that I've worked on. The first four had the Christmas tree center (though numbers 2, 3 & 4 had a slightly altered tree compared to the first).

As you can see, I've gone with a Snowman on this one. I saw this design somewhere out on the web, but not sure where. I wouldn't normally paint a perfectly good piece of Maple, but my wife has yet again make a good request. The "ball" portion of this ornament is Walnut.

Other than the hole on the bottom being drilled a little off center, I'm pretty happy with the looks of this one. I may have to try another tree and use some of the left-over paint from the NY Adirondacks project.

Sunday, August 20, 2006

Project Update... Seriously!

I know it's said in woodworking groups that "without pictures, it didn't happen", but I am here to say that I actually did work on that Oak dresser that I started oh so long ago for Violet.

Something had to be done. A week or so ago while family and freinds were at the house, I mentioned the dresser I was working on. My wife piped up that I wasn't working on a dresser, I just had a pile of wood in the basement. Well the zing sounded better being there and I did truly find it funny.

I also saw the postings of this guy's work at the LumberJocks site. Mark is today what I would like to be as a woodworker... talented! Seriously though, Mark does have some fantastic projects that he's done and seeing those is a nice reminder that I need to get my butt in gear if I'm ever going to finish some of my own.

I appreciate the feedback on what I should enter in the LumberJocks 2006 Summer Woodworking Contest, though I still haven't made a decision on what I might like to submit. I'll make sure to post my decision here first.

Sunday, July 30, 2006

I'm a LumberJock!

I've recently signed up for membership on a newer woodworking site called LumberJocks. LumberJocks put out this notice the other day:

LumberJocks.com Announces
First Annual Summer Woodworking Contest
International Woodworkers Invited to Participate in Free Competition

LumberJocks.com, one of the most innovative woodworking sites on the Internet, has issued a challenge to the world's do-it-yourself enthusiasts, weekend warriors and professional woodworkers.
Beginning this week, registered users from around the world can enter their projects—at no cost—to compete in the First Annual LumberJocks Summer Woodworking Contest, which runs through Sept. 23 (visit http://lumberjocks.com/contests/summer_2006 ).
"We wanted to add some sizzle this summer," says LumberJocks.com founder Martin Sojka, who also presides over the successful PowerToolBench.com . "Anyone who posts a project on or before Wednesday, Sept. 20, is eligible to compete—and like everything else on the site, contest participation is free."
Every project is required to feature at least one photo (up to three may be posted per project), as well as a personal story. These stories may cover tips and tricks, materials used, challenges encountered, sources of inspiration and what one might do differently in the future. Typical projects include furniture, home accessories, remodeling, woodcarving, toys, miniatures, gifts, fine art and sculpture.
What makes the contest unique is that registered users can rate each project on a 1–10 scale, post comments and ask questions, creating a truly interactive experience. Once a project receives three ratings from other users, it will automatically become the contest finalist.
Sojka's goal? To create an online community of woodworking aficionados who receive personal web space to post their creative works free of charge.
"There's no designated jury of experts in this contest," Sojka says. "The LumberJocks community will decide, through a democratic voting process, who takes top honors."
The top three LumberJocks will receive a free one-year subscription to their choice of seven leading woodworking magazines: Popular Woodworking, Fine Woodworking, Wood, Workbench, Woodworker's Journal, Woodcraft or American Woodworker.
"Contest winners will be announced on Sept. 24," Sojka says. "I can't wait to see the creative entries our growing community of members create!"


So here's the big question... with what I've posted here and on darrylmasterson.com are there any suggestions on what I should enter?

Saturday, July 22, 2006

Christmas in July

One of the several woodworking magazines I subscribe to is Wood Magazine. There have been some rather interesting articles in the few issues I've received so far. One article that recently caught my attention had to do with making a turned Christmas Tree ornament.

Having not made anything other than pens with the lathe, I thought it would be nice to make a smaller different project. The lighter wood is Cherry and the darker wood is Walnut. This is a very small lightweight ornament, it only measures about 3.5 inches long and 1.5 inches wide.

My wife is already making plans to give these as gifts this Christmas, so I'm sure you will be seeing more of these in the near future!

Saturday, June 10, 2006

Updates

I liked the title of my last post "On the Workbench". I found it a rather clever way to talk about stuff that I'm working on currently. I didn't want to have a hundred posts here labeled "On the Workbench", so I took this concept over to my other website, DarrylMasterson.com. I'm thinking that I may use that to show the updates of projects and continue posting here for other woodworking stuff.

The rain here in New Hampshire has been unbelievable so far this Spring. I'm fairly certain that I have no interest in ever living in Seattle! The only positive thing with the rain is that it's been spread out enough that I haven't had to deal with any of the flooded workshop issues like we had back in October.

Ok, well it's still fairly early, so it's back to the dungeon to continue working on an Adirondack that I need completed by Friday.

Tuesday, May 23, 2006

On the Workbench

I know it's been a while since I've posted an update. This is not due to inactivity however.

I have another Adirondack in the works. This is #2 for one of the girls at work. She bought one last summer and now she wants a matching one. I've got the frame assembled and have applied the primer. With the exception of the seat slats, the remaining pieces have been cut to size. I need to run the router over the edges to round off the sharp corners and give them all a quick sanding before getting the paint on these pieces.

I've also glued, cut and shaped the top of the Oak dresser. I've got the front back and sides glued up for the bottom drawer. I'm having a little trouble deciding what I want to do for the bottom of the drawers on this project. I'm trying to push this project farther into the "fine woodworking" category and I'm afraid that plywood drawer bottoms will hinder that. And at the same time, solid wood bottoms include more money, time, weight and work. I may just put off that decision until later.

Sunday, May 07, 2006

Demented Dimensions

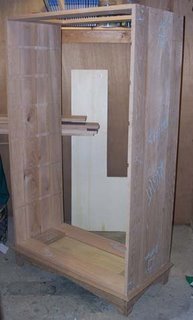
I finished putting the dovetails in the sides and the top & bottom web-frames. Now there is something to look at! Of course it's also a bit bigger than I had imagined. For some reason, a five foot tall, three foot wide dresser didn't sound as big as it really looks. And when I say really big, I mean "holy crap, I hope I don't have to move that very often!" BIG.

You can get the idea where the drawers are going to be in this picture as well. Each of those dados (aka grooves) on the inside of the left side of the dresser will help support a web-frame. The web-frame (sorta like a picture frame lying on it's back) will support the drawers and provide a smooth surface for them to glide on as they are opened and closed in daily use.

The web-frame on the bottom serves a dual purpose of supporting the bottom drawer and attaching the dresser carcase to the base.

The web-frame on the top will be used to attach the top to the dresser from the inside to prevent having any unsightly screws going through the top of the dresser. Not that is matters since it would take a rather tall individual to even see them if they were there!!

Next on the to-do list will be building all of the web-frames for the drawer supports. Pictures will follow as the progression continues...

Saturday, May 06, 2006

Violet's Dresser

I've been putting my spare time into that dresser I'm building my 2 year old. I've got both sides all glued up. I've got one side cut to final size and have cut the dados that are used to support the web-frames used as the drawer supports. I should have the second side finished up tomorrow, assuming the weather isn't to nice that I'm forced to enjoy it all day!!

Once I get that second side cut to final size, I can then get to work with that dovetail jig of mine to complete the case structure of the dresser. The web-frames for the drawer supports should be cake. Then it's just a matter of getting the drawers themselves completed.

I'll provide some pictures as soon as there is something to look at. Right now it's basically a couple pieces of wood with wome groves cut in it...

patience my friends.

Saturday, April 29, 2006

Want More Information??

Microsoft has a new project in the works called Office Live. This project provides free domain names and web hosting. For more info, check out:Microsoft Office Live.

The reason I mention this is not to provide advertisement for Microsoft, but to mention I've taken advantage of their offer and created darrylmasterson.com. This is a site that I'm going to work on building up to provide more information about the projects I'm working on, and hopefully someday use it as a resource to sell some items.

If you've got the time, have a look, and of course, any constructive critizism would be welcome... (so long as it's positive!). Just kidding of course, let me know what you think.

Thanks

PS ~ I have no intention of letting go of Woodworking Dungeon, so don't delete it out of your favorites list yet!

Friday, April 21, 2006

New Wood Haul

The order I placed last weekend is ready to be picked up. So tomorrow I'm going to cram a trip to the lumber mill inbetween two family events to pick up my new stash.

here's what I'm getting:

- 50 boardfeet of White Oak
- 25 boardfeet of Red Leaf Soft Maple
- 24 boardfeet of Eastern White Pine

The Oak and Maple are going to be used in the dresser for Violet and the Pine is for another Adirondack chair for one of the girls at the real job.

Monday, April 17, 2006

Dungeon Update

I ordered more White Oak this past Saturday. I expect that to be ready later this week so I can hopefully start this weekend building up the sides of the dresser I'm working on. I also ordered some Red Leaf Soft Maple which I'll be using on the drawer sides and backs.

In the mean time, one of my customers at the real job, Gary, was nice enough to send me some scrap wood that arrived today. I got a whole box of what I believe is mahogany. I'll have to verify that tomorrow when I thank him.

I didn't want this new wood to get all dusty in the dungeon, so I jumped right in and started working with it! It cuts like butter. Drills nice, and is really easy to turn on the lathe!!!

I've been talking with Gary about different finishing techniques the past week or so, he's helped push me in the direction of using Boiled Linseed Oil (BLO) and Johnson's Paste Wax. I've been messing around with a few pieces of scrap oak to see how the finish will look. I'd like to know a bit more of what I'm doing before I apply this new finishing process to Violet's dresser.

Here's a look at my second cigar pen. I made this with a piece of the wood I got from Gary (if you hadn't already guessed that!). I applied a new finish on this pen than I have on the rest. I mixed some of the BLO with the paste wax until I got a sweet potato / baby food type consistancy. Then applied some to a rag, rubbed it in and buffed it to a nice little shine.

I really like the color tone and the way the grain pops out with this finish. and yeah, I can admit that it is way cooler to mix my own finish than to just use something out of a bottle!

I'll be curious to see how this new finish holds up a real world environment though. The Behlen Woodturner's Finish on the pen that I use daily at work has all but rubbed off at this point, which I do find a bit disappointing.

Saturday, April 08, 2006

Not Just Another Pen

One of the girls at the real job had asked me to make a pen for her that she wanted to give to someone else as a birthday gift. She wanted a cigar style pen in this case, rather than the slim style that I've been making. It was initially weird working with the new style, but for a first try, I'm quite happy with the results. Purpleheart was the requested wood for this pen.

Thursday, March 30, 2006

Oak & Pine Adirondack

Technically, it's not done because the arms haven't been screwed on yet. But it looks done!

I got the seat slats attached tonight and I cut the notches out of the arms so the fit the way they should, but I'm tired so I'm going to call it a night... but first some details and pictures!

It seems like everything I read about woodworking, there is talk of grain matching. Basically this is when the woodworker takes great care in selecting the pieces being used. A simple example would be two dresser drawers that are next to each other. These drawer fronts should ideally be cut from the same piece of wood so the grains flows from one drawer to the next.

I took this philosophy and applied it to the seat of this adirondack chair. Take a look, you can see in this picture that the two seat slats used to be one piece of wood. The front three pair of seat slats have this look. Since there are seven total slats, the one in the back is the odd one out.

Here are a couple more shots of the chair in full view.


and, of course, it's quite comfortable!

Wednesday, March 29, 2006

From the Ground Up

As I mentioned the other day, I have started working on a new dresser for my youngest daughter. The style is a modified Thos. Moser seven drawer dresser. One of the biggest differences in the Thos. Moser seven drawer dresser and my modified design, (other than quality!), is the base. As much as I like the style of the Thos. Moser version, I'm not a big fan of the base on his. So I found a design from an entertainment cabinet in a woodworking magazine and modified that a little more to my liking.

I've completed all of the design and sizing work. I have even thrown together a quick mock up in pine in to a better idea of how things will look. And I've started piecing it together! The base design that I have is separate from the rest of the dresser, so I've started there. Here are a couple of pictures of what I've got so far...


I realize this doesn't show off much, but that's kinda the idea... is just a tease!

Sunday, March 26, 2006

All in a Days Work

I got to spend most of the day down in the dungeon today. I even made some progress on the two projects I'm working on!

I finished painting all of the pine pieces for the new adirondack. I also cut all of the white oak pieces needed as well. The back is partially assembled, there is only one more support brace that I need to attach.

And then there's the new project... This will be the my biggest undertaking to date. I'm building a new dresser for my youngest daughter. This will be another seven drawer dresser, similar to the one I made my oldest daughter, except is going to be about 6 inches wider and a few inches taller. I'm also taking some comments made on the other dresser into consideration on this new one. I'm going to a larger drawer at the bottom, and each drawer will get progressively smaller.

Project Preparation

It's Spring time, so it's time to get the Adirondacks rolling again! I've decided that for this next one, I'd build the base with Eastern White Pine and paint it with a semi-gloss exterior white paint. The back, arm rests and seat are all going to be made with White Oak that I will leave natural. I've read quite a bit lately that shows White Oak has a nice resistance to rot, so it should handle the weather well. Right now, I'm finishing the painting on the frame and I've cut the seat slats to size. I'm hoping to get this wrapped up by next weekend.

it'll be like merging these to chairs together...


I've got another project that I'm working on as well, but I'm not ready to start getting into the details of this quite yet...

Saturday, March 11, 2006

It’s Just Sad Really

I’ve got a great wood supplier that’s only about a 20 minute drive from my house. Tommila Brothers have a great selection of locally grown lumber including Red & White Oak, Cherry, Birch, Black Walnut, Hickory and Eastern White Pine among others. They are also one of those places where you can get Kiln dried rough or S4S lumber. Most of what I have purchased has been the S4S since I don’t yet have a thickness planer.

Last year, right around my birthday, my father and brother-in-law both won gift certificates to Tommila’s at a local home show. I dropped a couple of not-so-subtle hints that these gift certificates would make a great birthday present. Money for wood is always a nice thing to have, and sometimes seems hard to come by. So I ordered 50 board feet of S4S White Oak and with the gift certificates it only cost me $20! Trust me, that is a heck of a deal!

So Chuck, at Tommila’s, took my order and let me know it might be a couple weeks before the order’s ready. He even offered to drop it off at my house since he drives that way to get home each day. Four days later I got a call that my lumber order was ready and Chuck would be dropping it off that night.

I had already cleared a spot on my enclosed front porch to stack my loot, making it a nice easy shot to unload. When Chuck arrived, I grabbed the top board on a stack of about 7 pieces. I place the board down on the front porch and turn to see chuck carrying the whole stack…!

All I could do was laugh and try and explain away the fact that I sit on my butt each day in front of a computer talking on the phone. I quickly grabbed the next stack of Oak, hoping that I wouldn’t embarrass myself any further!

Wednesday, March 08, 2006

You Want Me to Build What?

I've got a new small project in the works, but I've been a little under the weather lately and need some more Black Walnut to complete it. So I'm going to share a little flashback with you...


Back in November of 2004 I was asked the question that I’m sure all woodworking fathers would love to hear. My oldest daughter, Jasmine, asked me to build something for her!

Not just a random thing, but a specific request. At the time of this request, Jasmine was 10. She’s a smart girl, but she has a habit of proving that common sense just isn’t all that common!

So, I’m in the hallway upstairs one night putting my programming books on a shelf. I had to move them up there to get them out of the way in the dungeon. Jasmine came out of her room and following conversation took place:

Jasmine: “Can you build me a drawer for Christmas?”
me: “You want a drawer?”
Jasmine: “Yeah, you know, to put my clothes in.” (...like I’m some sort of idiot.)
me: “Where are you going to put it?”
Jasmine: “In my room.”
me: “A drawer. Just a drawer?”
Jasmine: “Yeah.”
me: “You realize that a drawer is the box that that goes in a dresser, right? Do you want a dresser?”
Jasmine: “Oh yeah, that! Can you build me one of those for Christmas?”
me: “Yeah, sure.”


It ended up being ready for her birthday in April!


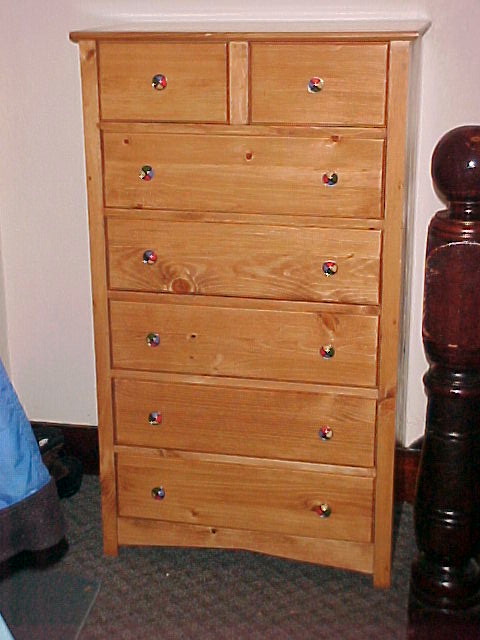
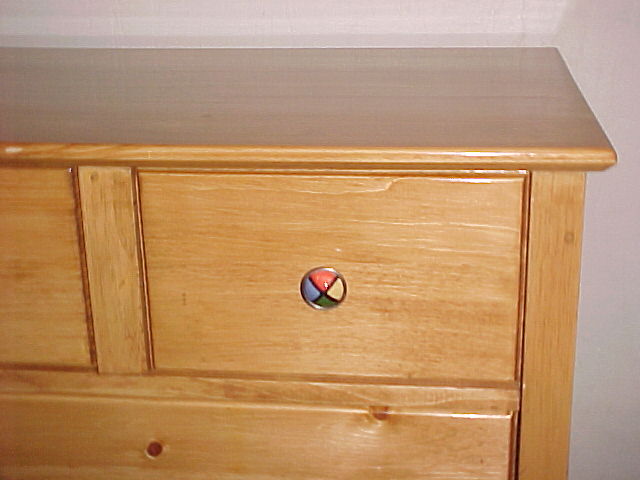
I built it with Eastern White Pine. It's finished with a couple coats of Ipswich Pine and a few coats of clear semi-gloss polyurethane. My father-in-law was nice enough to do the finishing for me. Though I had tofight to get him to use the stain I wanted. He wanted to go with more of a Dark Walnut. I'm not really a big fan of dark stained wood, and since I bought the stain, he did it how I wanted. I also chose to not use any mechanical drawer slides, figuring that they will only be the first thing to wear out anyway.

And I think this picture was taken the last time all of the drawers were shut at the same time! Soon after, it went up to her room and has had clothes sticking out ever since...