Since I started working on the teacher's pen project, I have been thinking more about what else I can do to create more intricate designs for my pens. I also attended a local bowl turners group meeting earlier this week where one of the guys talked about how he makes his segmented bowls. That seemed to kick the old imagination into high gear.
Taking my first step into segementation with smaller pieces, I cut up some maple that I had already planed down to 1/8". I laminated these little pieces with an accent color and turned a sample.
This is what I've got:
This shows me that conceptually I'm on track. Now I need to work on putting together a full sized blank so I can complete a pen and see how it looks.
Each piece of maple is only 1/8" thick. To show the scale, I'm including this picture that has my sample next to a dime. The length of the sample if just over 1 inch. The diameter of the sample is just about 3/8". The final diameter of a slimline pen would be a little bit smaller than this.
Hopefully in the next couple of days I'll have some time to work on putting that full sized blank together.
Thursday, December 20, 2007
Tuesday, December 18, 2007
10 of 13
Wednesday, December 12, 2007
Teacher Gifts continued
I completed two more of the techer gift pens tonight.
I have to admit that I had stopped making slimline pens as I was getting a little bored with them and focused more on the cigar style. I'm happy I took on this task for my wife as it has really proven to me that a slimline doesn't have to be boring.
... now what more can I do???
Tuesday, December 11, 2007
A Baker's Dozen
My wife asked the other day if I could make a few pens for the teachers at the elementary school our two younger daughters attend. I told her I would do it, but that I wasn't going to "just turn a bunch of pens", I wanted to make something nice if I was going to do it.
I spent much of this past weekend just getting the pen blanks prepped. I've now completed four of the pens. Here's the first one.
I'm pretty happy with how it's come out. I used a new finish technique (CA/BLO) that I haven't used before and I'm quite pleased with the results. To see the others as they are completed, head on over to my other site...
Tuesday, December 04, 2007
New Sled
As I had mentioned in a previous post, my table saw died recently. One of my friends at work has been nice enough to let me borrow his to work on a few projects. To return the favor, I made him a table saw sled.
Having learned from the first sled I made, I decided I'd make this one a little more flexible. I wanted to make it so none of the great 20.5" x 32.5" space was wasted by attaching guide blocks in the middle of the sled. So I made a sub-assembly.
a couple of spring clamps hold the sub-assembly in place and now it's set to make some more segemented / laminated pen projects!
I hope he likes it as much as I do!!
Monday, November 19, 2007
Happy Birthday Nanny!
My mother-in-law had commented how much she liked the cabinet unit I made for my wife's cookie sheets, so for my mother-in-law's birthday, we decided something should be done about the cupboard in her pantry. There were a couple of"shelves" in there already, and by "shelves" I mean a couple boards that technically were holding a few things up.
So my wife and I pulled everything out of the cupboard, discussed possible solutions and took some measurements. Then I got to work.
Here's a look at what it looks like now:
I made this in three separate units (left side, center and right side) to make it a little easier to build and install. Other than building square components to go in an area that isn't square, everything went along quite smoothly. And best of all, my mother-in-law is very happy!
All three units are built with pine harvested locally by my brother-in-law. I sanded with 100 grit and then applied a BLO (Boiled Linseed Oil) finish. And here's one final picture to give a little perspective:
Thursday, November 15, 2007
The Final Step
Thursday, November 08, 2007
the Continued Transformation
My last post showed how a piece of pine being used in my current project looks before I start working on it.
After running the board through the planer and jointer, it then looks like this:
The planer gets rid of the nasty looking rough surface and leaves what resembles a typical looking board.
This typical looking board is then glued to another typical looking board to create a wider typical looking board. When that wider typical looking board is sanded, it looks more like this:
stay tuned as progress continues...
Tuesday, November 06, 2007
New Project - Teaser
One of the reasons I like this hobby is the amazing changes that my materials go through to get to the finish line.
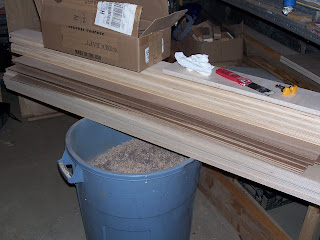
I have a new project in the works. Here's a picture of some of the material before I get started on it.
stay tuned to what happens next. I'm pushing to get this project done for this weekend.
I have a new project in the works. Here's a picture of some of the material before I get started on it.
stay tuned to what happens next. I'm pushing to get this project done for this weekend.
Tuesday, October 16, 2007
How Much is "Enough"?
My wife asked me this question tonight: "Don't you have enough"?
Of course she was referring to my announcement that I was headed out to see if I could get some more of that Baltic Birch scrap wood from the local furniture shop.
My answer was simple, it was: "No"
so I ask you... how much is enough when it comes to free scraps of Baltic Birch plywood? The first picture in this group is what I picked up in this trip.
I still think the answer is no...
Sharpening Jig
Since I started turning almost two years ago I’ve thought I could learn to sharpen my gouges freehand…
I can’t.
I’m also to cheap to buy one of those commercial style jigs.
Based on a design that I cannot remeber which forum I found it in (otherwise I would be happy to link and apply credit) here’s what I’ve done. I started with a little raised base (made from some of that free scrap baltic birch plywood I can’t stop collecting) and then simply added a little extension with a “V” block to allow the handle a comfortable resting place.
I was SHOCKED at how well this cleaned up my gouge. I should have done this a LONG time ago!
Kitchen Containment
I started this project quite some time ago. This past weekend I finally got it put into place. I do need to pull it down at some point to apply a stain a poly finish to make it match the other cabinets, but for now it is serving it's purpose.
The purpose is for saving my wife's life.
We had been storing her cookie sheets and cooling racks up above the little range hood / vent thing over our stove. Everything that was up there just seemed to have a way of becoming entangled like velcro, causing everything to come crashing down if you didn't use three hands to remove something!
There is peace at last!
Sunday, September 23, 2007
R.I.P.
Yes there was a death today.
My little Ryobi $99 tablesaw rolled over and died tonight. I was 3/4 the way through a cut on a piece of walnut for some new cutting boards and the flash of sparks coming from the motor caught my attention!
Poor thing.
My little Ryobi $99 tablesaw rolled over and died tonight. I was 3/4 the way through a cut on a piece of walnut for some new cutting boards and the flash of sparks coming from the motor caught my attention!
Poor thing.
Monday, September 10, 2007
Untitled
Make that a Double
Friday, September 07, 2007
Knots - His and Hers
I like the size and feel of the cigar pen.
My wife prefers the slim line.
As I mentioned in the previous post I have made my first Celtic Knot pen. I actually made two at the same time. One Cigar and one Slimline.
his and hers
his and hers
and yes, there are more in the works!
Let's Get Jiggy
I typically believe that if someone throws something away, they are doing it for a reason. I have heard also that one man's trash is another man's treasure.
I have known that there is a local furniture company about a block away from my house. I have also heard that their cut-offs are available for the taking. This past Sunday I found out what I've been missing, and I can assure you it won't happen again!!
Here is the haul I brought home Sunday
I have already begun using one of those longer strips in the back as a raised bed in my planer so I can make my thin strips used in the celtic knot pens. There are plenty more jigs and projects just waiting to come out of that pile...
Monday, September 03, 2007
Celtic Cigar
And here's my first ever celtic-knot:
I've been talking to my friend Gary about making one of these for several weeks now. The main wood used is Sapele (sent to me by Gary) and the celtic-knot is Black Walnut. I'm pretty happy with how it came out. Now it's time to expand on this design and see what else I can come up with.
Saturday, September 01, 2007
Let's Go Sledding
Something I've wanted to build for a while now is a sled for my tablesaw. I talked with my friend Gary several times this week about issues he's run into in the 4 different sleds he's built. I got the runners cut to size Thursday night. Today while my wife was out with the girls, I figured it was time to get to work.
I have a round piece of 1/2" cabinet grade plywood that was given to me at a turning group meeting I had attended last winter. I thought this would be a great project to use that. I cut a portion of the circle to give me a flat spot which would become the backer board (the board I'll hang onto as I push the sled through the saw).
Then it was time to attach the runners to the base. That didn't go nearly as bad as I had expected! Once the runner were secure, I attached a short piece of Oak to the front of the sled to keep everything from moving once the sled receives it's first cut.
The second part of the project I was nervous about was attaching the backer board, as this needs to have as close to accurate placement to enable accurate 90 degree cross cuts.
Once the sled was assembled, I applied some wax to the miter slots on the table saw. A little sanding on the runners to get a good fit, it was just like Gary said... it just slides!
Thanks for the input Gary. It's got a good fit with no side to side movement.
Check it out.
(right side)
(left side)
(underside)
Now it's just a matter of adding the 45 degree supports so I can start making some pens like Gary's!!
Tuesday, August 14, 2007
Bistro Complete!
Sunday, August 12, 2007
Bistro Progress
I didn't get quite as much done as I had hoped for this weekend, but I did just apply the final coat of paint to the top, yeah!!
Since I'm on vacation from the real job this week, tomorrow I will tackle the base.
Tuesday, August 07, 2007
Prime Time
I like knots. Most people don't seem to, but I do. I think they add character to a piece of wood. Some knots are better than others though. Ideally a nice tight knot would be the best to incorporate into a project.
But sometimes, a knot that isn't so great can be fixed up. The knot on the underside of the bistro table top is the perfect example. I decided to keep this knot in the piece for the simple fact that the table is being painted and it won't be seen.
This knot had some dried and loose pieces in it. So when I first started putting the top together, I used a screwdriver to pluck out all the loose bits out of the knot. This left a nice gaping hole instead. I filled the hole with a mixture of 2-part epoxy and some wood shavings.
I didn't get a before picture (sorry), but I did snap a picture before I applied the primer so I could use this as a bit of education for myself.
I think if I were to need to do this again, I would just use straight 2-part epoxy and skip the wood shavings.
Oh and speaking of the bistro table, I got a full coat of primer on the top tonight, so here's a shot to give you an idea of how the table will look when finished.
Monday, July 16, 2007
Bistro Update
No pictures today, but I have finished the final sanding of the bistro table. All of the corners have been rounded over and the table is now ready to be finished.
I have practiced my finishing method for the table:
1) shellac - applied to seal the knots to prevent them from bleeding through the paint
2) 1st coat of primer
3) wood filler - to fill any imperfections that become visible after the 1st coat of primer is applied
4) 2nd coat of primer
5, 6 & 7) coat of exterior white latex - a light sanding will be done with 220 grit sandpaper after step 5 and 6.
I'll post pictures again after the shellac has been applied and then again when the table is completed.
Saturday, July 07, 2007
1st Contest Entry
This years contest has two categories
With this table project, I've had a concern over how I wanted to attach the top. Considering the top is 36" square, I knew it was going to need a system that allowed the top to be removable (if only to get the table out of the dungeon!).
After some pondering, I came up with a solution that allows for a tool-free removal of the top. Here are a couple pictures of how I achieved that.
so basically what happens, is the top is put on a little off center and is then pushed forward so the little buttons on the underside of the top lock on the little tenons that are attached to the frame. With this solution, I've entered the table in the Wood Joinery category of the LumberJocks contest. The contest runs through the month of July and the winners will be announced after the voting in early August.
Wish me luck!
Monday, June 25, 2007
She Must Love Cooking!
This is something that should have been posted a while ago...
One of the girls at work asked me to make a cutting board for her mother's birthday. She didn't want just any cutting board though. She wanted a heart shaped cutting board.
I was a bit skeptical at first even though I told her I would do it. I thought it was going to look horrible. I also thought it was going to be a bit of a waste of time since it is kind of a gag gift. Apparently this girls mom is constantly buying theme gifts for her even though she doesn't like the chosen theme. So to get her mom back, she always tries to find a gift that incorporates a heart... hence the heart cutting board.
To give you a size reference, this was cut from the full size boards I've done, so it's roughly 11"x15"x1.5".
I have been informed that her mom does love it.
Bistro Table
Ok so for anyone that still even looks at this blog, here's a REAL update!
I've got the legs and the frames sanded and I've started to assemble them. I need to make one modification still to the top frame, so that hasn't been secured yet. But that didn't stop me from snapping a picture to prove that I have actually been working on something all this time!
Keep in mind we still don't have a finished product yet. The top has been cut to size, but it still needs to be sanded and have the corners softened.
The stack of crates to the right of the table are just a bit taller than the stools that will be used with the table.
This is a modified design that I got from an article in a recent edition of Wood Magazine. For anyone interested in getting started in woodworking, Wood Magazine has my vote for the first subscription you should get. They have by far had the best projects of any subscription I've had.
Saturday, June 09, 2007
Stay Tuned!
While it may appear here that little has been going on, that's really not what's happening.
My little dungeon has had it's fair share of activity lately, I'm working on getting something "post ready"
Stay Tuned...
My little dungeon has had it's fair share of activity lately, I'm working on getting something "post ready"
Stay Tuned...
Wednesday, April 04, 2007
Cutting Board mini
The last showing of this style cutting board was prior to it receiving it's oil bath. Here's a nice shot of the mini with it's aged oil coatings...
Using a combination of black walnut and red leaf maple and measuring in at 11"x7.5"x1.5" in size, I'm aiming to make this little guy a standard item on the darrylmasterson.com site.
Tuesday, March 27, 2007
Setting a Standard
My thoughts are this: If I'm going to try and pursue any sort of woodworking business, having a few standard items that customers can choose from would be a good way to start. These next few posts will include a few design ideas for a standard set of Cigar Pens.
I consider the Sapele Cigar Pen the classic or standard cigar pen. Since this was the first style that I had started using and it's just got a nice warm comfortable look to it. I can see that just about anyone could use this style pen.
Sapele, also known as African Mahogany, has a nice rich brown color to it. I've modified my finishing technique slightly on the set that I made tonight. With these, I sanded with 220 and 320 grit sand paper. I then applied a coat of BLO (Boiled Linseed Oil) and wiped off the excess for a total of three coats. I then upped the speed of the lathe to the range of 2500RPM and rubbed the pen down with 0000 steel wool. The final step is to wipe the pen of with a tack cloth. This gives the pen a nice sheen.
Thursday, March 22, 2007
The Acrylic
Subscribe to:
Posts (Atom)